Etching process
- TOP
- Etching process
Etching process
Laminating the resin sheet to the metal sheet in the next process. Degrease and clean the surface to increase adhesion strength.
 01
01
Creation of etching plates
Based on drawings and data, the original plate is created in CAD. The master plate consists of a solid black (light-shielding) part and a transparent (light-transparent) part, and is patterned in the form of a negative plate of the desired shape.
 02
02
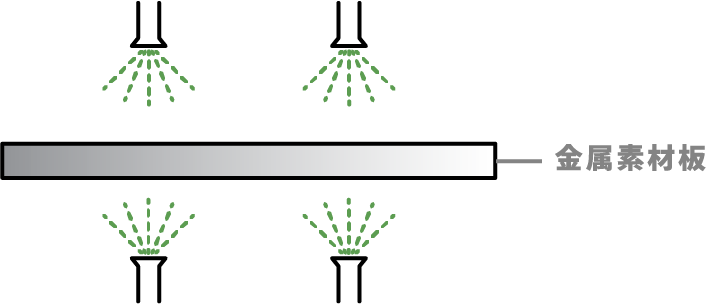
Degreasing and cleaning of metal sheet materials
Laminating the resin sheet to the metal sheet in the next process. Degrease and clean the surface to increase adhesion strength.
 03
03
Laminate
Attach photoresist to metal sheet.
*Photoresist: Photosensitive resin that reacts to light and cures.
 04
04
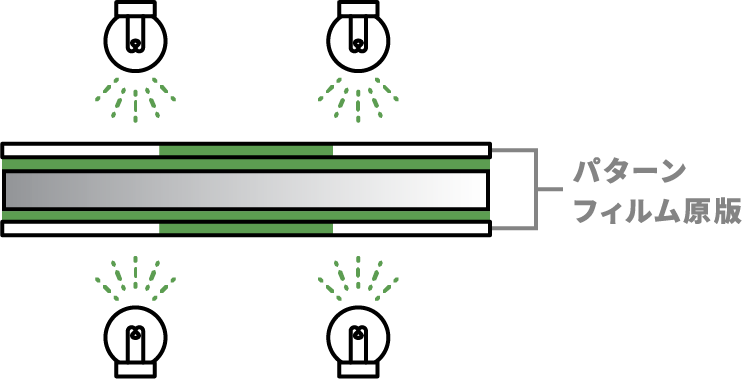
Exposure
An etching plate is used for exposure to light.
The etching plate has a light-shielding part and a translucent part in a pattern.
The resist exposed to light from the translucent part cures and forms a pattern as shown on the original plate.
 05
05
Developing
A special developing solution is sprayed on the exposed material.
The resist in the uncured areas dissolves, leaving a bare etching sheet of metal over the desired pattern.
 06
06
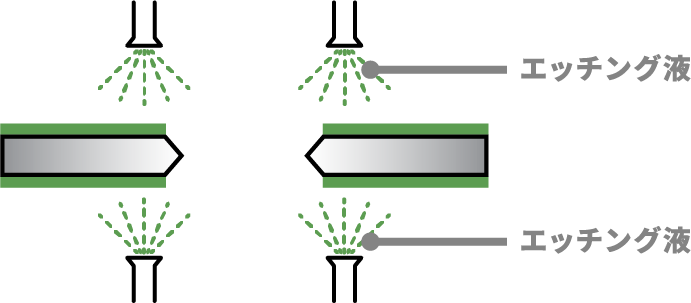
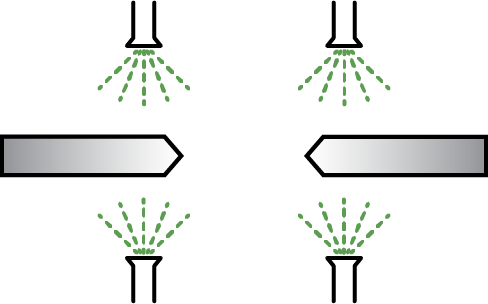
Etching
An etching solution that corrodes and dissolves metal is sprayed.
The metal in the area not protected by the resist on the etching sheet dissolves and disappears, completing the desired shape.
 07
07
Separation
A special stripping solution is sprayed to dissolve the photoresist.
The resist is removed from the etched sheet and the desired metal product is produced.
 08
08
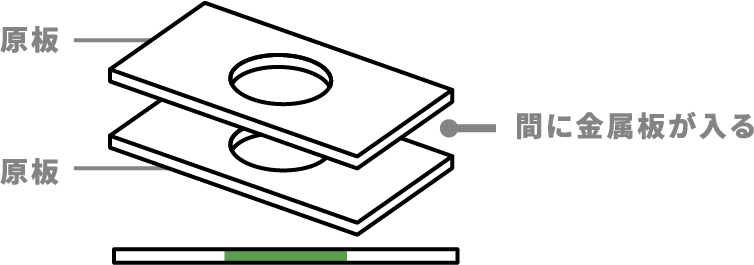
Individualization
The product is made into individual pieces after it is impositioned on the sheet.
In etching, multiple pieces are attached to the sheet with joints like a plastic model for work efficiency.